Edit Content Page
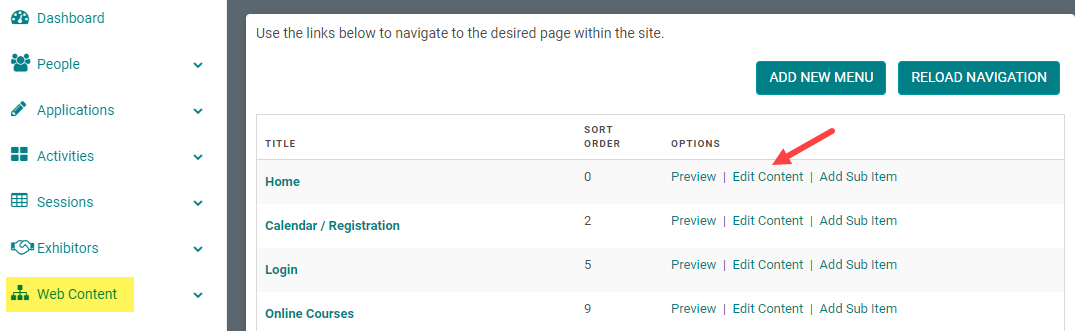
Step 1: Go to Web Content > Site Map > click 'Edit Content' next to the Menu Title you want to add content to
-OR-
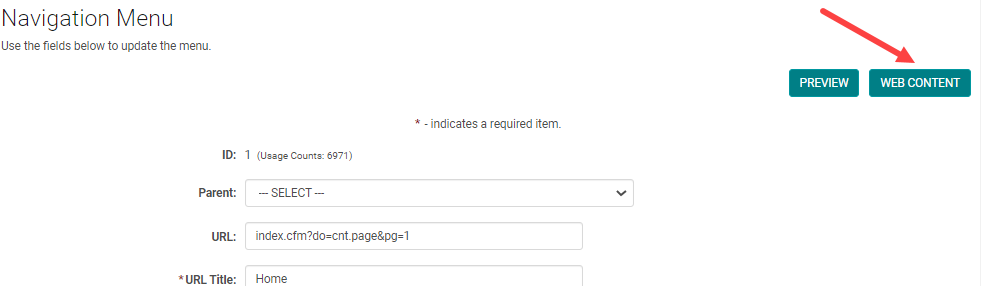
Step 1: From the 'Edit Navigation' page, click 'Edit Content'
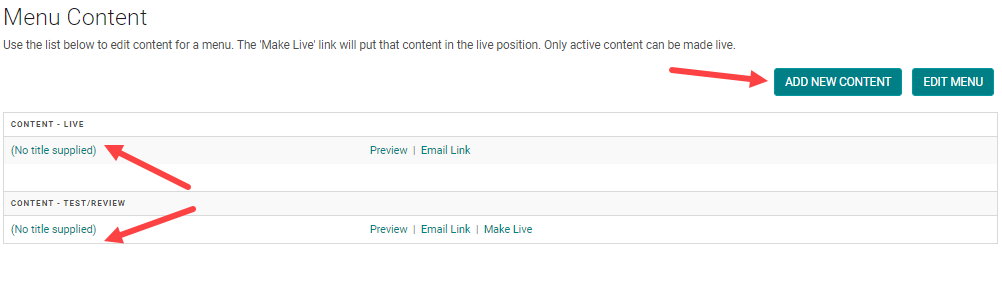
Step 2: Select the existing Content Title you want to edit, or click 'Add New Content'
Step 3: Use the options on the page to enter and format your content
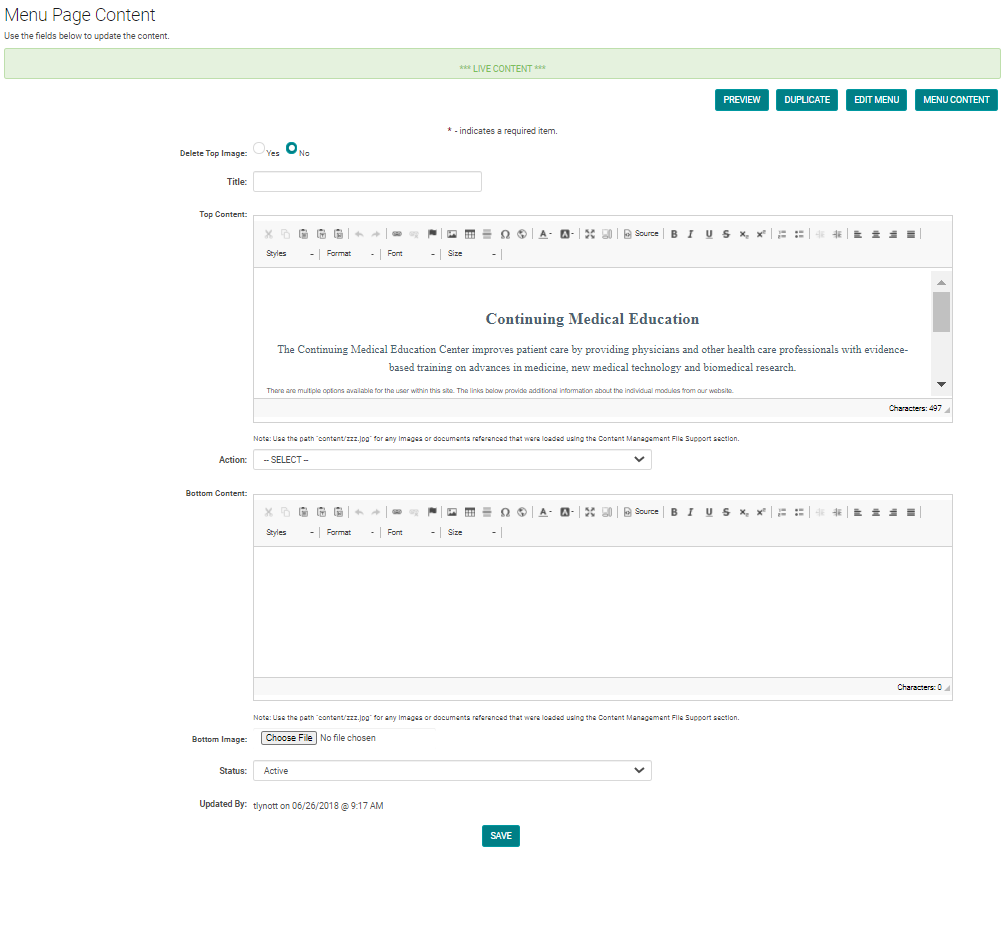
NOTE: this page is currently in 'live' status, which means the edits will immediately be published when if click 'Save'
Field Definitions
- Top Image - Use this field to upload an image to be placed at the top of your content page. NOTE: you do not have the ability to move or resize the image with this feature.
- Title - This text will show up as a header at the top of your content page.
- Top Content - Use the WYSIWYG (What You See Is What You Get) editor to enter the main content for your page.
- Bottom Content - Use the WYSIWYG editor to enter content at the bottom of the page. NOTE: this is only applicable if you are using a dynamic Ai page that is pulling data.
- Bottom Image - Use this field to upload an image to be placed at the very bottom of your content page. NOTE: you do not have the ability to move or resize the image with this feature.
- Status - Always keep the status of the page 'Active.'
- Updated By - Will show you the last user who saved the content page, along with a date/time stamp.
Related Articles
Add New Content Page
Step 1: Go to Web Content > Site Map > click 'Edit Content' next to the Menu Title you want to add content to -OR- Step 1: From the 'Edit Navigation' page, click 'Edit Content' Step 2: Click 'Add New Content' Step 3: Add the appropriate content and ...Test/Review Content and Live Content
Test/Review Content: Is content that is NOT published on the website. Allows you to create "pages in waiting" or duplicate a page and make edits without publishing your content immediately. Live Content: Is content that is published on your website ...Add Image to Web Content
STEP 1: Go to Web Content > Files STEP 2: At the bottom of the page, select the 'Choose File' button STEP 3: Search your computer for the correct file and click 'Open' STEP 4: Click the 'Submit' button NOTE: check the 'Overwrite if file exists' to ...Add a Document link to the Web Content
STEP 1: Go to Settings > Web Content > Files STEP 2: At the bottom of the page, select the 'Choose File' button STEP 3: Search your computer for the correct file and select 'Open' STEP 4: Select the 'Submit' button NOTE: check the 'Overwrite if file ...Edit Menu or Sub Item/Menu
Step 1: Go to Web Content > Site Map > Click on the Menu Title you want to edit Step 2: Make any necessary changes to the Navigation Menu and click 'Save' Navigation Menu Field Definitions: Parent – To be selected if you are creating a submenu. This ...