Edit Menu or Sub Item/Menu
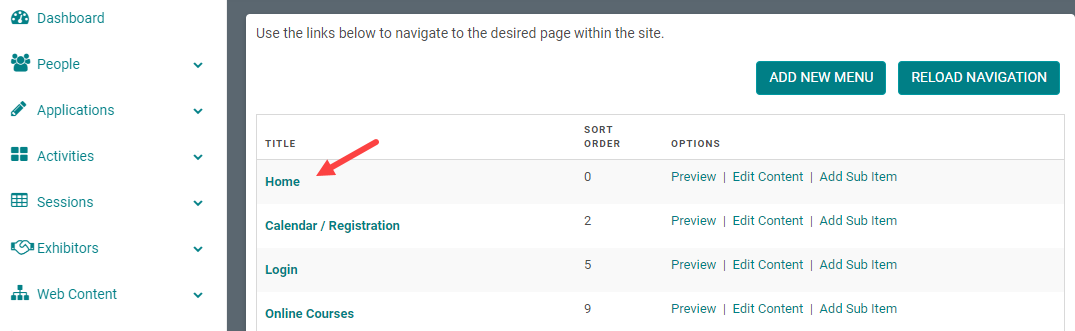
Step 1: Go to Web Content > Site Map > Click on the Menu Title you want to edit
Step 2: Make any necessary changes to the Navigation Menu and click 'Save'
Step 2: Make any necessary changes to the Navigation Menu and click 'Save'
Navigation Menu Field Definitions:
- Parent – To be selected if you are creating a submenu. This will determine which main menu the submenu appears under. This can be left blank on the parent menu item.
- URL – System auto-generates the URL. Do not edit this. If the menu item you create must reference to a document uploaded to Web content > Files, enter the file URL here.
- URL Title - Text that appears when you hover the mouse over the menu bar and the text that appears on the admin site map.
- URL Link Text – Text that appears on the menu bar.
- Activate On/Deactivate On - Project settings must be updated to use these fields. These fields are meant to activate and deactivate the pages per the dates/times entered here.
- Metadata Keywords -Project settings must be updated to use these fields.
-
Forward to URL – The menu will automatically re-direct to a URL you specify. Use this function if you are not adding content and if you are linking the menu item to a different functionality or to an external page.
- Order – Determines the order in which the menu item will appear. Tip: always skip the order by at least 3 numbers to make re-ordering easier.
- Security Level – Do not edit
- Root Menu – If “Yes,” the menu will be placed on the main menu bar. If “No,” the system will assume it is a submenu and you must assign it to a “Parent”.
- Quick Link – The menu will appear at the bottom of every page on the site. NOTE: you may need to ask your Project Manager to activate the Quick Links on your website.
- Link Only –Forces the system to link directly to the url provided and not 'track' the link as a 'click through.'
- New Window – If “Yes,” the menu will open in a new window. If “No,” the menu will open within the same window. Tip: open external websites and documents in a new window so users are not taken away from your website.
- Static Page - Used to indicate that page should not show up as a menu item. This allows users to create content that does not have a menu item tied to it.
- Status – Determines if the menu will appear on the menu bar. “Active” menus will appear, “Inactive” menus will not appear. Not to be confused with the status of menu content.
Step 3: Close Window and Click 'Reload Navigation' from the Site Map
NOTE: You must 'Reload Navigation' anytime you edit a navigation menu in order to see your changes on the website.
Related Articles
Add New Sub Item / Sub Menu
Step 1: Go to Web Content > Site Map > Add Sub Item Step 2: Complete the applicable fields and click 'Save' NOTE: The 'Parent' field is pre-populated with the Main Menu Title Navigation Menu Field Definitions: Parent – Select the parent menu item ...Add and Edit Scrolling Banner Images
When there is scrolling banner added to your site you have the ability to change the images and update it as needed. The slider is setup to come from the web content. How it works: There is a parent menu item called Slider or Slider Images or ...Link Menu or Sub Menu Item to a document
STEP 1: Go to Settings > Web Content > Files STEP 2: At the bottom of the page, select the 'Choose File' button STEP 3: Search your computer for the correct file and select 'Open' STEP 4: Select the 'Submit' button NOTE: check the 'Overwrite if file ...Add New Menu
Step 1: Go to Web Content > Site Map > Add New Menu Step 2: Complete Appropriate Fields and Click 'Save' Field Definitions: Parent – To be selected if you are creating a submenu. This will determine which main menu the submenu appears under. This can ...How to create an Activity listing and Activity sub item page for Enduring Material that links to the Enrollment/Registration
First step: Create an Activity listing page. This page is to show the list of Activities from the web site menu. For this follow the instructions under Web Content - Add New Sub Item/Sub Item help doc. Make sure the below information is: URL Link ...