CPE Monitor Report and Setup
The CPE Monitor Report is used to report credit activity for pharmacists and pharmacy technicians. It contains the required information in the format specified by the Accreditation Council for Pharmacy Education (ACPE)." ACPE providers generate this report and submit it to Accreditation Council for Pharmacy Education (ACPE), who then report the credits to National Association of Boards of Pharmacy (NABP), which helps the pharmacist track their credits earned.
Note: HighMarks needs to turn on the CPE Monitor Reporting capability for each client. It is not a standard feature.
The Initial admin Setup on the HighMarks to generate the CPE Monitor Report.
Step 1: Attendees and participants of the CE activities have to enter NABP_eid and Date of Birth (if the Date of Birth field is not filled in the contact information page, it does not get pulled onto the membership information page) under 'Edit Membership Information' of their My Account page. (This is the only step for the front-end user)


Step 2: Go to the Activities and search for the existing Activity or add a new Activity for which ACPE Credits will be awarded. Once the Activity is created click on 'Manage Certificates' on the Activity dashboard. Select the ACPE certificate from the drop-down list and click 'Add'. Enter the total number of ACPE credit hours a person could get through this Activity. These hours are used to determine whether or not a participant has gotten full or partial credit at the activity level.
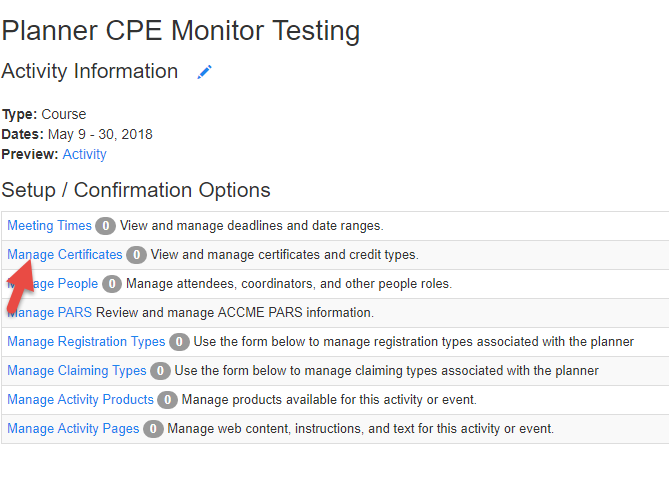

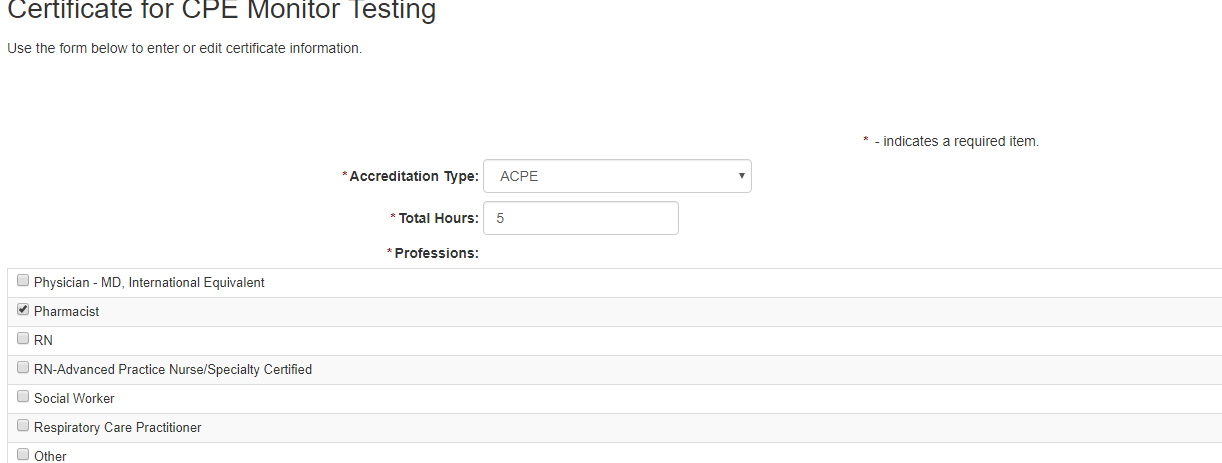
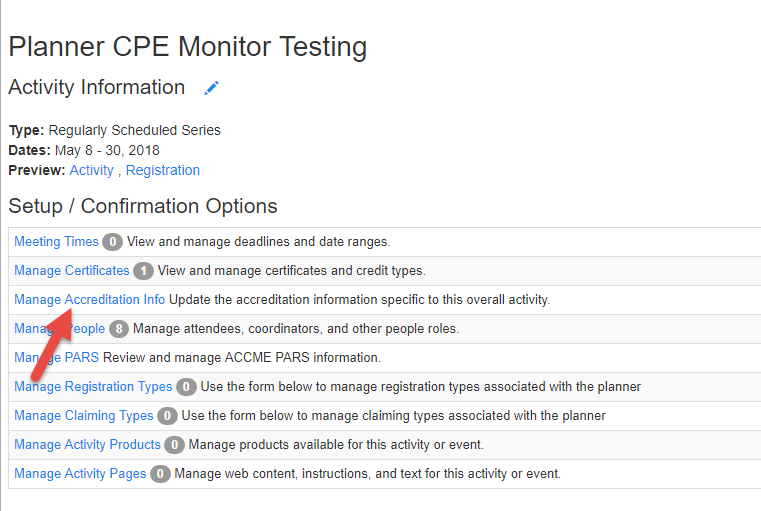
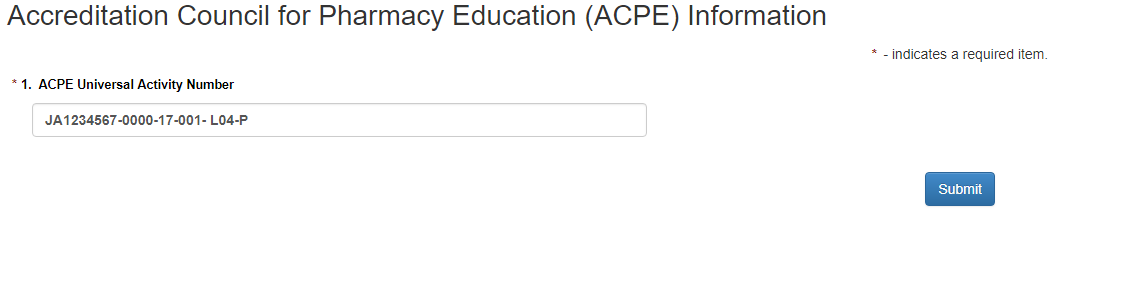
Step 3: Once the ACPE Certificate is added under the 'Manage Certificates' a new option named 'Manage Accreditation Info' gets added to the Activity dashboard. Click on the option and upon clicking the Accreditation body you will get to add the ACPE UANumber for the Activity. Click Submit.
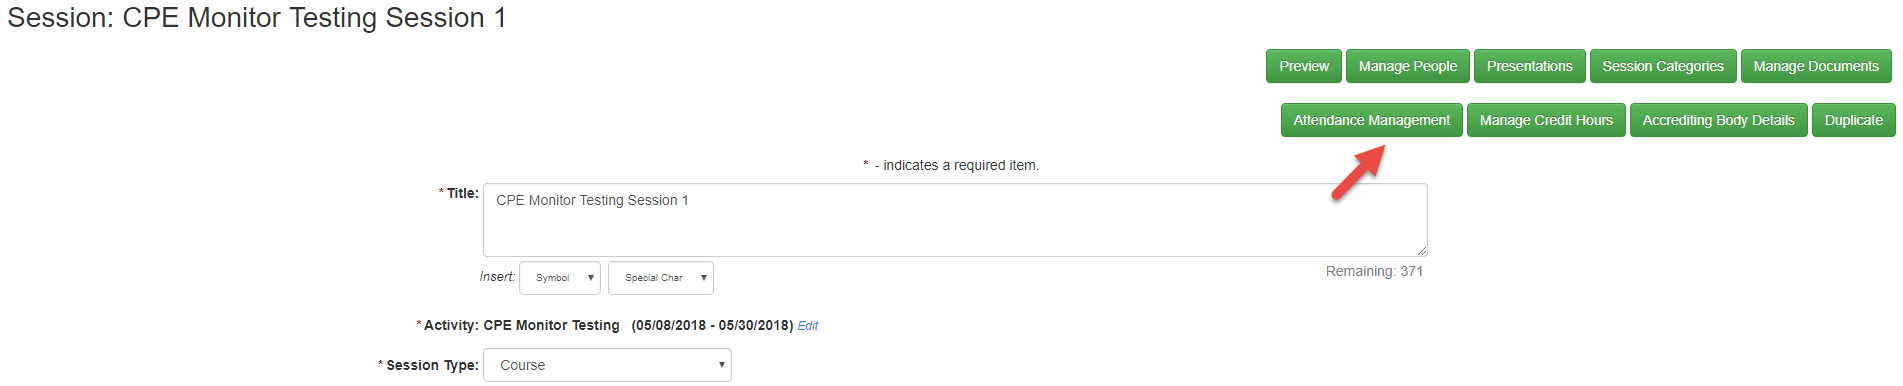
Step 4: Add the Sessions. Only when you have Session specific UAN numbers, which are different for each session add the credit hours under 'Manage Credit Hours' and UAN number details under 'Accrediting Body Details' at session level. Session ACPE credit amount signifies the maximum ACPE credit hours for the session, and is used to determine whether or not a person has gotten full or partial credit at the session level.
Note: Within a single activity you should not have an activity UAN and a session UAN. Either use only the session level UAN or use only the activity UAN. If adding at the session level, they could be different for each session.

Step 5: As per the business rules you may either have attendees attend the event and claim the credit through the front end or the admin adds the attendee records to the Attendance Management. The credits get added to the person.

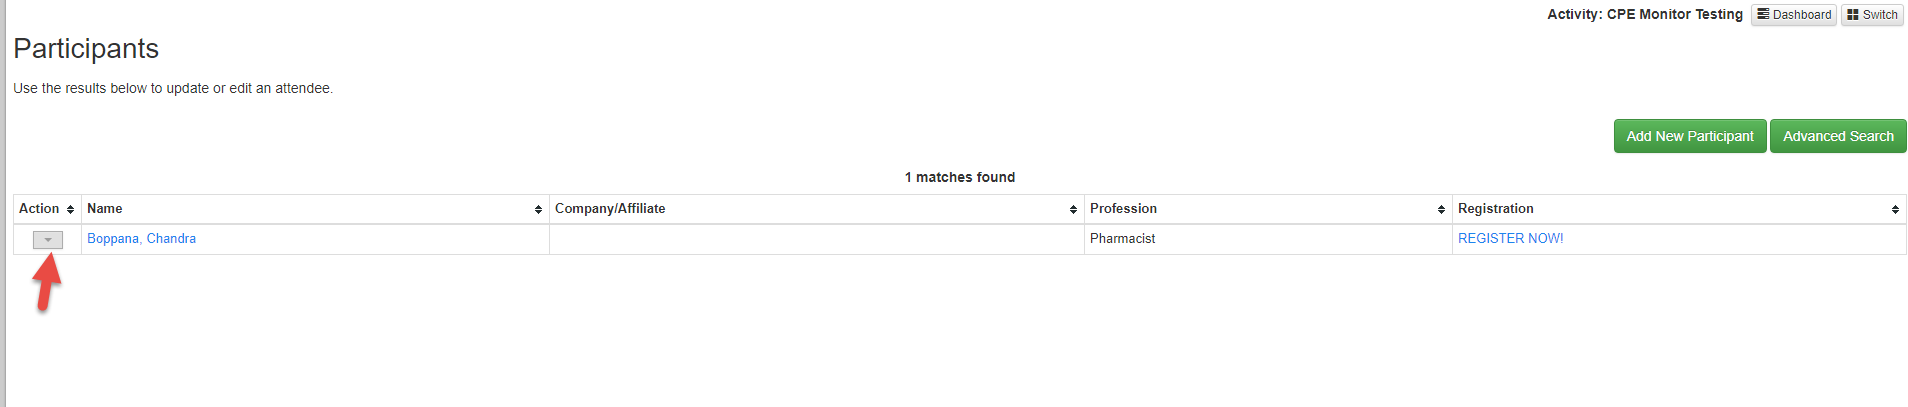
If you want to issue partial credits, search for the person under People/Participants. Click on the drop-down
icon under 'Action' and click on 'My Credits' and Edit the Credits awarded.

How to generate the CPE Monitor Report
Select the Activity for which you want to generate the Report. There are three ways to generate this report.
1. Person Report: (
- Reports> People/Participants> Credit Reports >CPE Monitor Report
)
Will return participation grouped by person.
Includes contact and other filter sections, and an additional filter for participation date. The filters are applied to the people
If the activity is selected, the people report will only include the participants and participation for the selected activity.
2. Activity Report: (Reports> Activities> Planner Reports >CPE Monitor Report)
Will return participation grouped by activities
Includes normal activity search filters, and additional filter for participation date. The filters are applied to the activities
3. Session Report: (Reports> Sessions> Credit Reports >CPE Monitor Report)
Will return participation grouped by event
Includes primary, location/date and other filter sections, and an additional filter for participation date. The filters are applied to the sessions.
Report Options: There are two version of the report: One for jointly-accredited providers and non-jointly-accredited providers. You can use the below options in different combinations based on your report result expectations.
include additional non-CPE monitor data in the download - This will include additional columns in the download that are not part of the CPE monitor template. This includes person name, activity/session title, code, and dates. This report includes Pharmacists with full credits and other Professions with either full or partial credits.
Use joint accreditation template - This will update the filtering and download to use the joint accreditation template, which excludes the aggregate counts and includes the additional columns for partial credit and credit awarded
Include deleted pharmacists and pharmacy technicians attendance - This option includes the pharmacist and pharmacy technicians that were removed from the activity. For the non-jointly-accredited template, this also includes the aggregate count for deleted non-pharmacists.
Include pharmacists and pharmacy technicians that were not awarded full credit - This option includes pharmacists and pharmacy technicians that received partial credit for the activity. These are excluded by default in the non-jointly-accredited provider template, and are always included in the jointly-accredited provider template.
Related Articles
Exhibitor Setup
Exhibitor Setup Checklist: 1) Create/Add a form to collect the Initial Exhibitor Request 2) Make the form available for the public to submit requests. 3) Review the Request form 4) Create an Exhibitor account 5) Open Exhibitor Meeting times Step 1: ...Badge Setup and Printing
Setting the badge Template for the entire site: This basic template can be imported to any activity and tweaked as per the Activity set up. Go to Settings > Badge Template Click on 'Add' to add containers for the badge Hover over the container until ...Registration Types
Registration types are used to categorize attendees. Exhibitor, Member, Non-Member, Student, Resident, Intern, Employee, Admin Staff etc are the typical Registration types. How to add Registration Types: On the Admin navigation menu click on ...Session Status Report
Session Status Report -Filter the report by activity or other session information to get the sessions you want. This report shows the status of the forms and document uploads for people assigned to sessions. The report is grouped by session. Run ...Session Roster Report
1. Session Roster: Roster report gives you a list of people who have taken the pre and posttests on Self-Assessment and Enduring Materials sessions. You can select the type of the Session on the report filter section. Sessions > Primary Reports > ...